Here we continue the build process, focusing on painting and highlighting the details that bring a model to life. You can find examples of the processes described in our articles.
The way you paint your car is as individual as you are, it becomes a style other modellers can recognise. To start with we will give you the benefit of our experience but you will soon find the methods you feel confident with and that provide the results that please you.
Beauty being in the eye of the beholder means we all like slightly different effects on our models. Some car modellers like block painted pristinely clean models, some like to add light and shade (which is common in military modelling) and others want the full on weathered and worn look. To a certain degree this will depend on the area of car modelling that interests you the most. For instance rally cars seem to be habitually dirty while F1 machinery is usually sparklingly! Historic cars are not as highly polished as modern cars but often have more metal parts. What ever your main interest we all have to start some where and more or less follow the same processes to achieve the paint job we want.
We have mentioned on the preceding pages the initial washing of model parts, and washing sub-assemblies prior to painting. It is recommended but often omitted by modellers. I suppose it will depend on your available time and patience.

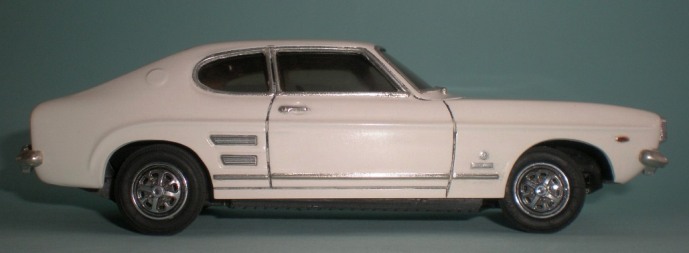
The seats and cabin of the car above are neatly painted in one colour. This is what we call block painted. i.e. One block of colour.
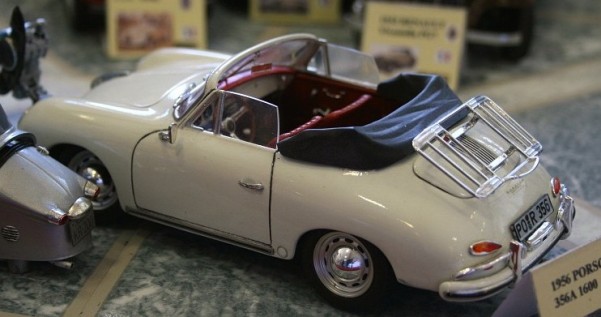
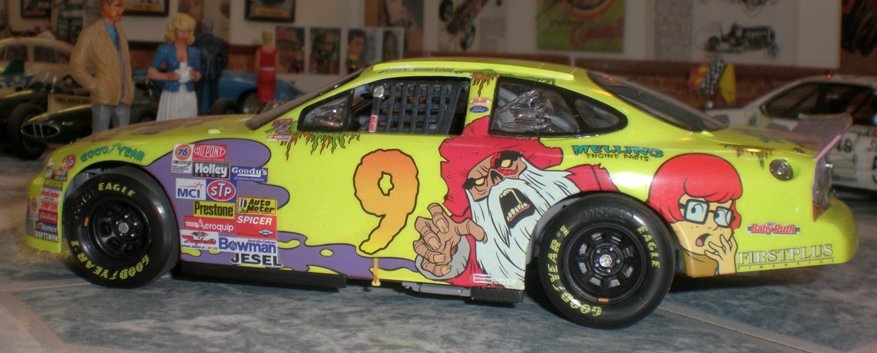
The seats and interior of the car below were block painted then washed and dry-brushed to give a more realistic, worn effect.
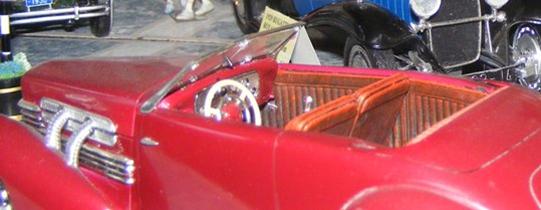
This is all a matter of individual taste.

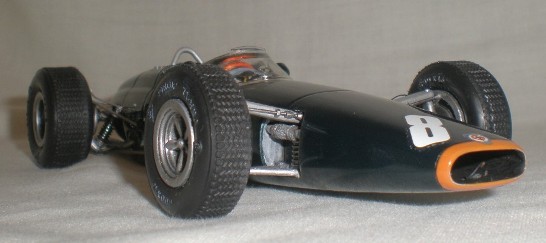
This car is block painted, although it is nicely done it doesn’t show off the detail.
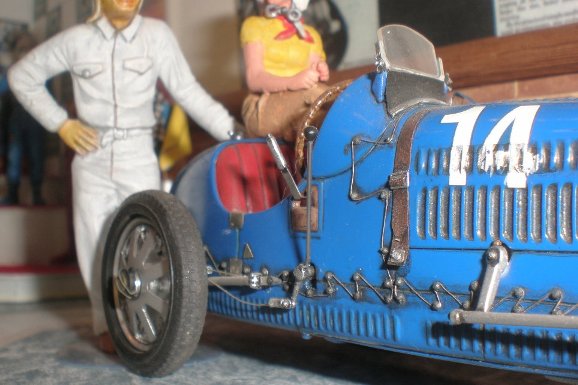
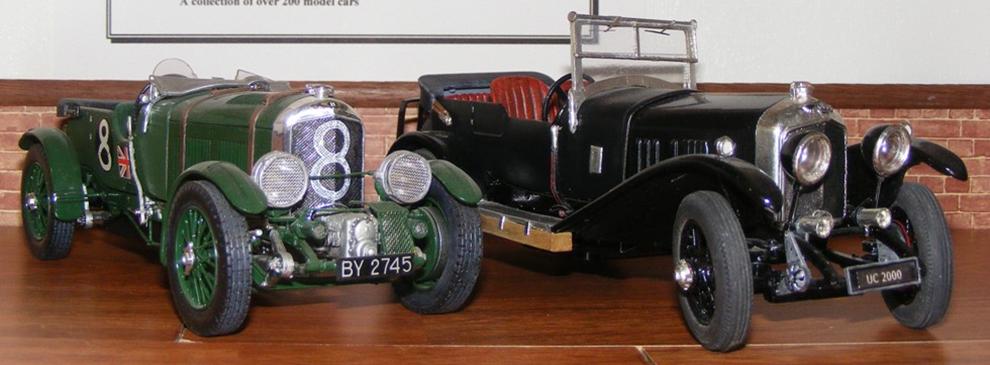
In contrast the Bugatti below has been washed with dark and earthy inks which help pick out the details.
Painting the body
The first step in the painting process is too give the body a gentle, very fine sanding (note the word fine, and use the finest grade you have, you don’t want to create new scratch marks and make more work for yourself).
The reason for this light sanding is to help highlight any dips or sink marks as well as helping the primer to take to the plastic. If there are any defects you will need to deal with them now, then re-sand the area to blend it in.
This is then followed by priming. The point of priming is to provide a good surface for the paint to adhere to, so it doesn’t flake or rub off. It also helps show up any defects that were missed before, or were not visible, but still need attending to. Once again attend to any defects straight away and sand down and prime again.
This process may have several repeats as you deal with all the defects. The aim is to get a smooth paint job where all the body is evenly coated with primer and all the unwanted join lines are gone. As we have mentioned several times the end result is directly linked to the quality of the preparation.
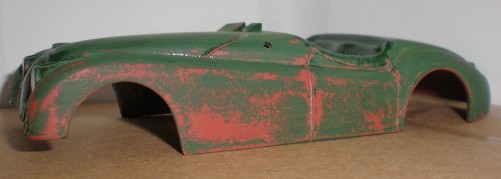
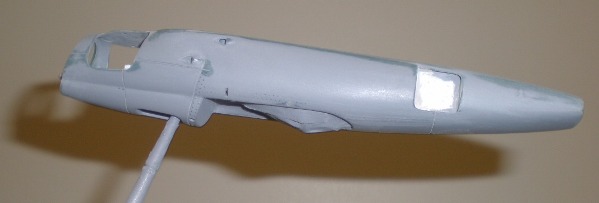
The picture above show the priming and painting stage. The Jaguar body is in the middle of repeated sanding and re-spraying to achieve the required finish. Patience and preparation do pay off. See our article on the restoration of this car.
Also on show below are methods of supporting a model for spraying. This can require some lateral thinking to find a way to get full paint coverage and no contact patches that could spoil the finish.
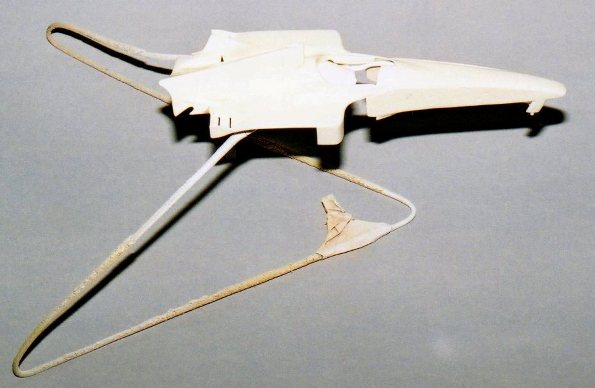
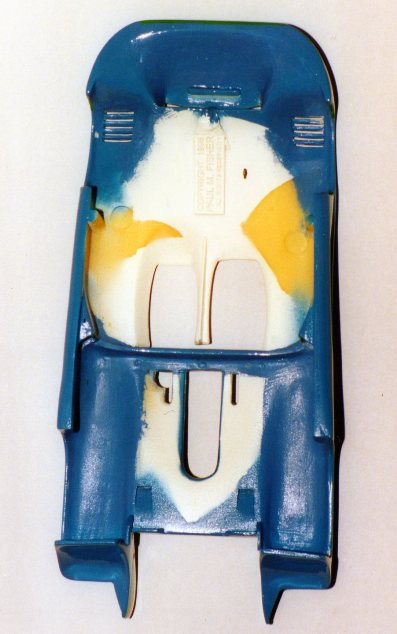
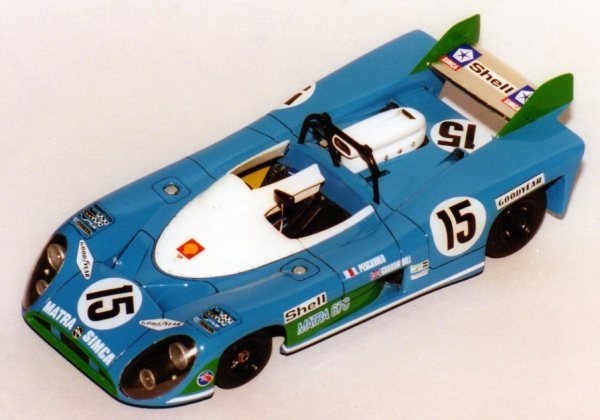
The interior shot of the Matra shows that the wire frame had been taped to the body to hold it in the frame, and the white primer coat which was under the final blue body colour. Later it was mounted on a spray can cap, using double sided tape, to aid handling without touching the finish.
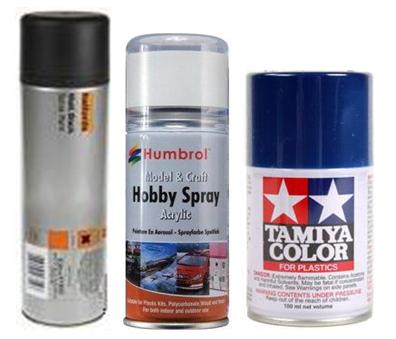
We use Halfords plastic primer which is very smooth compared to metal primer and thus reduces your sanding and preparation time. It is also hard wearing, easy to use and as an acrylic based paint won’t attack the plastic, or resin. You can apply any kind of paint over the acrylic primer. Similar products are available from Games workshop in their Citadel paints range and other automotive and model manufacturers. For those who wish to use an airbrush then the Zero and Alclad 2 primers are also excellent all round primers which can be used on plastic, white metal and resin model kits.
Take time to read the instructions with any paint products you use and follow the safety advice.
Note that some colours have a recommended primer colour, usually white, red or grey. If you use a colour like red over grey primer it will appear a little darker than over red primer. Likewise, if you spray it over white primer it will appear a little lighter. This can be useful at times when you want to vary shades on cars represent ageing or differences between years of production.
Be aware that some automotive primers and paints cannot be applied to plastic kits as they eat into the plastic!
Always follow the manufacturers safety advice when spraying paints.
Spray painting from a rattle can.
1. Read the information and instructions on the can first.
2. Shake the can for at least two minutes.
3. Ensure the body, or other parts, you want to paint are securely attached to a handle of some sort.
4. Ensure your spraying area is well ventilated and you will not breath in paint spray, were a protective mask.
5. Hold the can, approx 12inches from the model and sweep the spray across.
6. Sweep back and forth, up and down, while turning the body to build up an equal coating.
7. Build up a series of thin coats inspecting the finish between coats and sanding and attending to faults as they might occur.
Be careful not to sand through the paint on raised edges.
8. Give the model around two weeks for the paint to fully harden, use this time to work on the other areas of the model.
9. Lightly sand and then, if your using automotive paints, ‘T-cut' the paint to a smooth finish. Use a polishing kit and model wax if you're using enamel model or other modelling paints.
10. Apply decals and use a good quality clear coat to seal the decals. Repeat step 9 as appropriate.
To elaborate a little on the subject. Knowing all the information and instructions for a spray can will give you more confidence to use it. Remember to invert a can and clear the feed tube and nozzle after use or they will block and you won’t be able to use the rest of the paint.
Some people suggest warming the can in warm water before spraying, the idea is that the paint will flow more easily as the internal pressure is raised. Any spray paint can is a pressurised container and raising that pressure in an uncontrolled way is dangerous. Should you choose to do this you must take responsibility for the consequences.
The distance between the spray can and object being painted is a matter of feel and adjusting for circumstances. If you are too close the paint pools and runs, Halfords paint does contract as it dries but this doesn’t get rid of runs. If you are too far away the paint starts drying before it gets to the subject and you end up with the “orange peel” effect, thus if it’s a hot day you may need to be a little closer to the subject than on a cold day.
When you are building up coats start with several thin “mist” coats. You need to achieve equal coverage all over, not to fill in recessed panel lines or swamp raised details. Once you have a good base level coat then you can start to use “wet” coats. A wet coat is a heavier coat where you can see the “wet look” of the paint. Do not over do these coats, and do not be tempted to take short cuts and go straight to the wet coats.
Please do let the body paint harden off. If you try to handle it too soon you run the risk of pressing fingerprints into the paintwork. I don’t mean just greasy marks but literally fingerprints indented into the paint. These are very hard to get rid of.
Depending on the quality of your paint finish you may be able to go straight to the cutting and polishing of the paint. If you do need to lightly sand the finish before “T” cutting use worn fine grade wet and dry abrasive paper, or a polishing kit, and avoid sanding through any raised areas. If you are going to apply decals do not use any polish on top of the “T” cut. These will repulse the water activated adhesive and stop the decal settling down properly. Polish comes after the decals, but be careful that the polish doesn’t attack the decals.
If you are going to overcoat the decals with any clear coating be sure to test this on some spare decal. Sometimes decals do not take well to clear coats. We have used Halfords Acrylic clear over many decals now, applied in very thin mist coats and this technique of gently coating decals will work for most clear varnish mediums. There are several advantages to covering the decals with clear. Decals often dry out and lift over time, cracking and flaking off. Sealing them down prevents this and helps slow down any discolouration. It also helps hide the carrier film so the decals look more like they are painted on.
Most clear acrylic paints can be treated the same way as pigmented paint and carefully treated with a polishing kit to bring up a high quality shine.
Where we have mentioned “T” cut we should say cutting compound. There are many colour restorers for automotive paints, they all have similar effects though some are stronger than others. They cannot be used with all modelling paints so if you’re not using automotive paint don’t used automotive colour restorers. you'll need a model polishing kit instead.
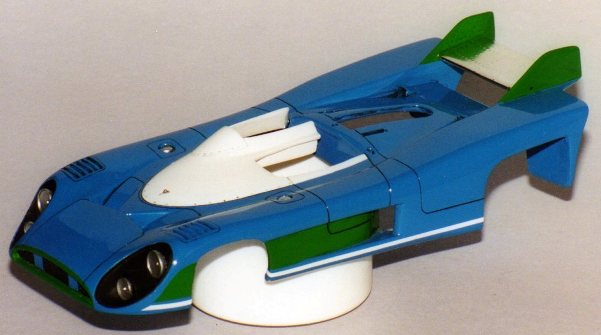
It is much easier to spray dark colours over light colours than the other way around. You can see on the Matra above that the primer was white followed by coats of gloss appliance white, then the main blue body colour then the darkest colour, the green. This means you have to mask the colour areas you want to protect.
For those of you wondering about airbrushes and acrylic modelling paints please don’t think we are in anyway inferring these are inferior. They are not. At this point we are simply suggesting that the easiest way for a new modeller to achieve a good standard without excessive initial expenditure is by using automotive products.

All these cars were painted with Halfords Acrylic car paints, sanded, “T” cut and polished as described. Even the clear coat over the Tamiya Williams F11’s decals.
This car was airbrushed with acrylics to get the right colour, then the decals applied before Halfords clear was gently sprayed overall to seal the decals and give a highly polished finish.
To protect your hands during spraying you can get thin plastic or rubber gloves. Be aware of any allergies you may have to latex or the dry powder sometimes used in them.
Brush painting.
The cheapest way to paint a car is sill brush painting with enamel paints. The Bentley "Blower" above is brush painted while the black "3Ltr Tourer" is spray painted using Halfords acrylic auto paints.
You can achieve a great finish with brush painted enamels if you are patient, careful and prepared to put in the work. Although you may not need to bother with primer the process of sanding and preparation is still important. If this is your chosen medium, follow these steps.
1. - Read the information on the tinlet.
2. - Stir the paint really well.
3. - Always try to brush in the same direction.
4. - Avoid using too much paint.
5. - Put the painted item in a dust free re-sealable box or cover with take away tub to the keep dust off.
6. - Give the paint plenty of time to dry before handling.
7. - Carefully use a polishing system (available from hobby store online) to smooth and get the final finish.
8. - Seal the finish & decals carefully with a good acrylic clear coat available from high street and online stores.
9. - Carefully use the polishing system again.
10. - Apply a good quality model polish overall.
This is just as time consuming as any other method of painting and finishing but some modellers have perfected this method, as with all areas of modelling it is personal choice and how much effort you are willing to put in.
It is very difficult to brush acrylic paint over a larger surface, it dries too quickly to settle so it streaks and is easily lifted when half dry and lumps up ruining your finish. Enamel paints take longer dry so can settle to a smoother finish more easily. However, if you are using acrylic paints then you can still get a good brush applied finish over a larger area by following the steps below.
1. - Prime the surface of the parts you wish to paint.
2. - Thin some paint with a good quality acrylic paint thinner to milky consistency.
3. - Use a broad flat brush and apply a thin coat, do not overload your brush. Don't expect to cover the model in one coat.
4. - Give the first coat plenty of time to dry.
5. - If there are any blobs of defects in the paint gently sand them down with your finest grade sandpaper.
6. - Thin some more paint with water to the same consistency as the first coat and apply in the same way.
7. - Do not worry if there appear to be some streaks present, colour will build up over time. Again, do not overload your
brush, the watered down coat takes longer to dry out and too much paint will pool and run creating new problems.
8. - Repeat steps 5, 6, and seven until you have built up a consistent colour level or over.
9. - Acrylic paint can be easily scratched back to the primer, be careful handling and sanding the paint.
10.- When you are happy with the colour coat, seal it with a clear varnish to harden it all together.
You can use any acrylic varnish over an acrylic paint but DO NOT use an enamel clear spray can paint.
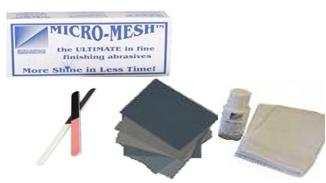
The Micro mesh polishing system has proved useful to many modellers. It consists of a series of ever finer grit cloths and sticks which can be used to smooth out the finish. Each cloth removing the scratches of the one before until only a smooth finish is left.
Then a polish can be applied and buffed up with a soft cloth.
Caution must be used to avoid rubbing through the paint on raised edges and ruining all your hard work.
Airbrushing.
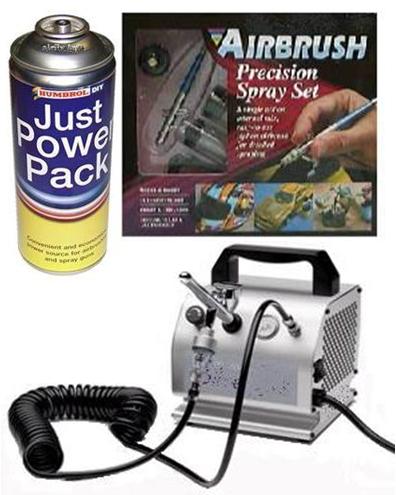
If you get into car modelling and want to use an airbrush make sure you read all the information you can. Think about how much you will use it and for what sort of jobs. Will you be wanting a compressor too?
There are many different airbrushes and compressors (not always universally compatible) and I do not claim to be an expert in this area, but most of the manufacturers give good information on their web sites.
One thing to think about is the cost. You can pay a lot of money for an airbrush and compressor but do you really need to? While we both have airbrushes we have seldom used them, although we are moving more in that direction at this time. They take a lot of preparation and cleaning time to get the best results from them, not to mention they need quite a bit of experimentation to learn all the things a good airbrush can do. If you are willing to put in the time, great, go for it, outstanding results are achievable. If you are going to use an airbrush a lot get a compressor, the “power pack” cans for airbrushes are not controllable so you loose pressure as the contents deplete. This then affects the paint flow and quality of finish.
I admit I find it difficult to get a good finish with gloss paints through an airbrush. Matt paints are much easier to get a good result with. This is no problem because acrylic modelling paints can still be sprayed with an automotive acrylic clear top coat. I should mention that this gives a better cost balance than buying only automotive paints, and the range of colours is infinite as you can mix acrylic modelling paints to the shade you require.
It is also worth remembering that some of the most recent paints available, like Zero paints and Alclad II, need to be airbrushed so you have to purchase and experiment with the airbrushing set up, but exceptional results can be obtained. These pains often come up as a matt finish and need a
Zero paints clear coats can be used over lacquer based paints and acrylics as can those from Alclad II can be airbrushed over most paints. They have different characteristics and can be useful in a variety of ways.
With all that out of the way the processes for spraying with and airbrush are the same as with a rattle can. Build up light coats to a uniform depth of colour without being tempted to put too much paint on in any single coat. As airbrushing requires paints to be thinned it is very easy to get “runs” in the paint.
If you can afford, and can obtain, small quantities of medical alcohol this is a better thinner to use than water. It starts to evaporate right out of the airbrush so it reduces the chances of runs occurring because the paint is already starting to return to its un-thinned state and to dry.
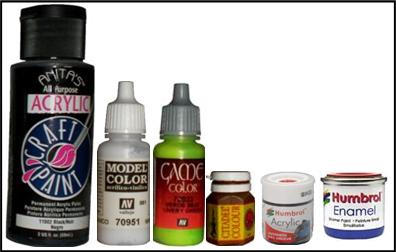
There is a bewildering array of acrylic and enamel paints around today. In addition the artists oils can also have uses for the car modeller.
If you can afford to test out different mediums then do so as the old maxim that there is no substitute for experience still holds true.
If you can’t afford such luxuries then keep reading through our articles to see what we use and when.
Alcohol is flammable take precautions if you choose to use this medium.
Masking.
However good a decal sheet might be there will always be a time when you will need to spray two colours on the same car. That means masking, and few processes can be as rewarding, or as annoying.
Although a simple idea, of covering an area to stop paint getting on it while changing the colour of another, masking needs careful thought. Compound shapes, curves and the colours involved need to be considered.
First rule is simple, always spray darker colours over lighter ones.
Masking a straight line is easy but what type of masking medium should you use. Several model companies make masking tapes and Tamiya's is one of the best for demarcating the line. Once the edge line has been set you can use normal tissue and decorating masking tape to cover the rest. I mention tissue as the less sticky stuff you put on the paint the less the chance of it pulling the paint off while you’re trying to remove the masking again.
One of the problems with masking is stopping the new colour ‘bleeding’ under the tape, leaving you with an unclean line. This is exaggerated when trying to mask curves and compound shapes. The best way is to spray a little of the original colour along the edge of the masking. If any paint is going the seep under the tape it will be the same colour as the base coat.
After spraying the new colour on and giving it a little while to become touch dry run a sharp blade carefully along the edge of the masking tape this helps the paints separate and leave a sharp line. Remove the masking before the paint is fully hard and it will be a little easier.
The longer you leave the masking in place the harder it will be to get off successfully. Adhesives can ‘eat’ into your paint finish so you want to get them off as soon as is reasonably possible.
Masking shapes is a little harder but with a little care shapes can be traced, copying from the drawings or from the decal sheet, onto artists masking sheets like Frisket (which is clear, flexible and low tack) and cut out with a sharp knife. Using individual strips can work but you need to ensure you seal the joins, usually with a liquid medium like Maskol.
Compound curves need a flexible tape, like Trimline tape, that can be bent around shapes. Be careful not to stretch the tape as it will try to pull straight and move from your intended position. Once it is set in position fix it with maskol, or similar, then mask the rest of the area with tissue and normal masking tape.
Masking can leave a ‘step’ between the two colours if you use thick coats so this will need to be sanded down and covered with a clear coat that can also be sanded down till you get an even paint finish. Obviously this needs care.
One way to avoid this is to ‘Reverse mask’. This means masking the lighter colour, area spraying it, then removing that mask before masking what you have first sprayed and spraying the darker colour. This should mean keeping the two colour coats at the same thickness and avoiding the ‘step’ problem, however it can be tricky to get a ‘clean’ line.

Simple masking of the pre painted cockpit has been done with ordinary household masking tape. The same is used to cover the front suspension rocker arms to avoid building up a thick coat of paint on them.
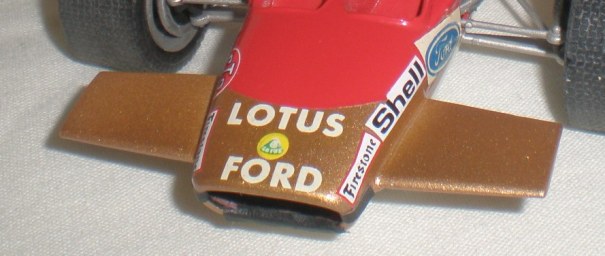
The nose of this Lotus 49b was masked using trimline tape, and then masking tape, so the gold could be sprayed over the red and white.
See more pictures of this car in the Graham Hill collection.
This car has blue decaling to hide the join between yellow and white paints, however any unevenness in the finish would show under the decals, affecting the overall look of the car.
See more pictures of this car in the Williams collection.
Painting sub-assemblies.
Moving on to cover sub-assembly painting take a look at the next few photos. Pegs, crocodile clips, cocktail sticks and double sided tape all prove useful when it comes to mounting parts and subassemblies for painting. You can find more information about our painting methods in our example articles.


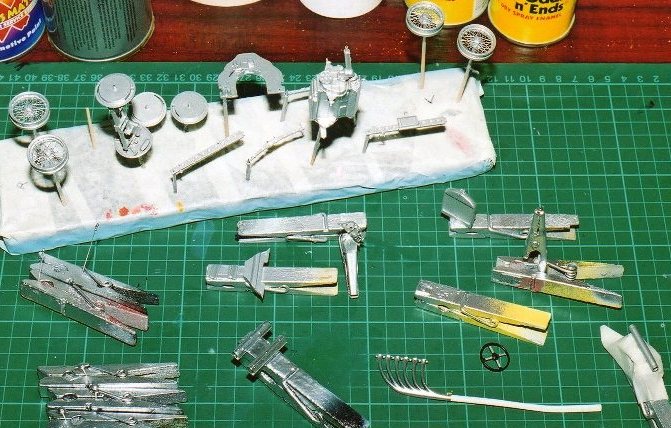

This scratch built pedal assembly is attached to the peg with double sided tape. This allows easy handling during painting.
Notable in three photos is the technique of dry brushing. The radiators were sprayed a metallic silver then a dark ink wash applied to the faces. The raised detail is then lightly dry brushed. That is to say the brush is dipped in paint then nearly all the paint is wiped off again. The brush, almost dry, is lightly drawn across the raised detail picking it out.
The same technique has been used to highlight the Peugeot rally seat and the pedals.
On the left you can see how cocktail sticks can be used to mount all sorts of parts and then keep them off the painted sides by sticking them into a block of polystyrene. Masking tape has been wrapped around the polystyrene block to help prolong its working life.
Our basic technique for painting small parts and sub-assemblies is to mount them up and spray them with a block colour, then pick out the details by brush painting. The base coat paint used depends on the subject but is often still automotive paint because of its hard wearing nature. Repeated handling of sub-assemblies can rub the paint off so having a hard wearing paint job can be very important.
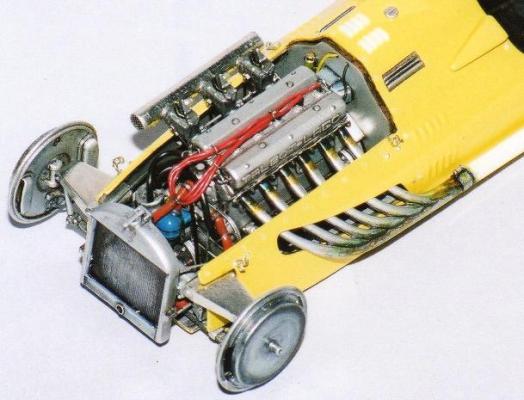
By using washes of inks it is possible build up the effects seen here on the exhaust, radiator, brake drums and around the Logos on the rocker covers.
The citadel acrylic ink wash range can be very useful. By applying a wash allowing it to dry a little then wiping it of a subtle staining effect can be achieved. It is then a case of repeating the process to build up the depth of colour that you require.
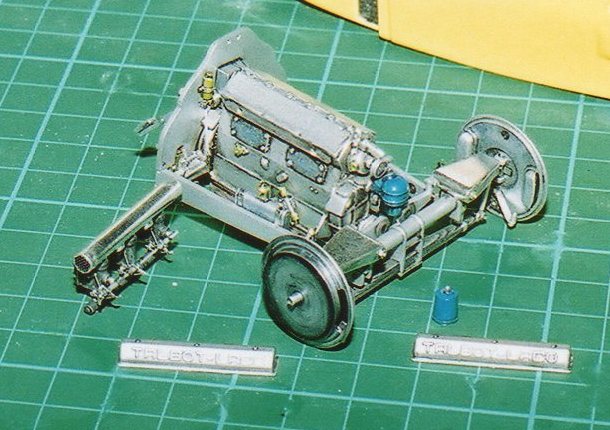
In this photo the effect of using inks to help pick out details can be seen. For more information see the our article on the detailing the Talbot-Lago.
If you don’t want to invest in inks you can simply water down acrylics in a pot, I have read it should be the consistency of milk, but I still don’t know what this means so just add a little water at a time until the paint runs freely. With a little experimentation you’ll soon find the consistency you require. Consistency will very depending on the effect you want.
You can thin down enamels with enamel thinners to do the same job, but you must be careful in the application of this medium as it can effect the underlying coat of paint.
Metal finishes.
If you have read this and thought “It’s such a lot of expense and hassle, I don’t think I’ll bother with an airbrush”, perhaps you should reconsider. Some finishes are best replicated by airbrush because the best paint for the job is specifically made to be applied by airbrush. I am talking about metal finishes. Most cars have metal on them some where. Whether it is the dull metal of a gearbox housing or the bright chrome of head lamps or bumpers. Replicating metal authentically is hard.
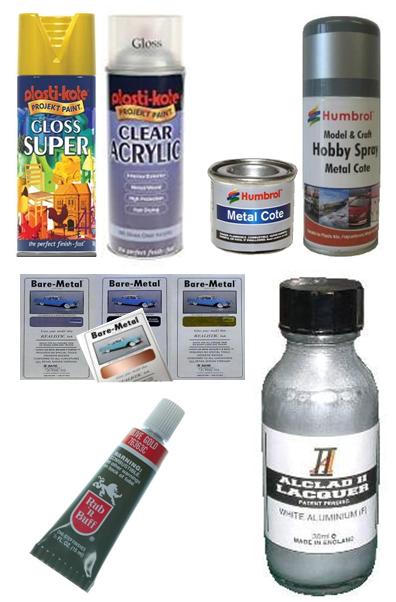
The old Humbrol metallic paints had large metallic flakes in them, too large for a scale metal finish. They were also very hard to brush over larger areas, streaking easily and drying in varying shades and degrees of brightness. Generally they dried matt too and this is no good for shiny brass radiators or highly polished chrome hub caps. Acrylic paints are similarly blighted when it comes to use on body sized areas and tend to be dull. The more modern Humbrol metal coat range of paints was a big step in the right direction as they didn’t have the huge flakes in and once dried could be buffed up with a soft cloth. To my eye the finish still looked rather more worn than highly polished but a big improvement all the same.
A similar product available from hobby and craft stores is “rub & buff”. This is a range of metallic paints used by artists to age frames it can be used on cars too. The basic idea is to apply the paint by rubbing it on, then to allow it to dry and the buff it up. It is good for highlighting as if plating has rubbed off or that in the recesses has decayed.
The bare metal foil range is good for some metal effects as it gives a much more solid metal look rather than a metallic flaked paint look. But it can be a little dull for chrome and the black chrome and gold version suffer from the colour being easily rubbed off during application of the product!
A better product on a similar vain is metal decals. These are a recent development, initially appearing in F1 car kits as a way to replicate heat shielding. Now they can be bought as larger sheets and in stripes of various thicknesses. Fantasy print shop have a good range.
There are craft paints in the plasticote enamel range which look very promising but in my experience they look great right up to the point you have to handle the part to put the model together. Any contact leaves a mark and when you try to buff the mark off you just introduce more marks. This paint needs to be sealed with a clear coat, but it must be the same plasticote products version other manufacturers clear coats send it dull and/or speckled.
That brings us back to the airbrush and the Alcad II range. I have seen modellers get outstanding results from this product, and it comes in an extensive range of colours. It does require time consuming preparation, practice and particular process to be followed to get the results but they are worth persevering with. But they must be air brushed on so you may well change your mind about getting an airbrush again.
So which of these products should you use to replicate metal parts?
The short answer is, all of them. They all have particular qualities that are useful, it’s a matter of learning which does what so you can use the most realistic one for the job at hand.
Read through our other articles on detailing and building to find more examples of what product we use where and why.
Gloss coats.
There are many specialist top coats these days and most paint manufacturers also do a clear varnish for use with their paints. Generally speaking a top gloss coat is a good idea, especially if your model has a lot of decals on. Decals can dry out and flake off over the years so sealing them down with a gloss coat is recommended.
The important thing to remember is that some decals do not take well to gloss coats and wrinkle up irretrievably. Test on spare decaling if you can and always apply gloss top coats as lightly as possible building them up a little at a time rather than using heavy coats.
Once your top clear gloss coat is all hardened off you can use a polishing kit as mentioned before, or ‘T’ cut if using automotive paints, to get a good smooth finish. To really set our model off use a good quality polish to add that final level of protection.