Restoring the Jaguar XK120.
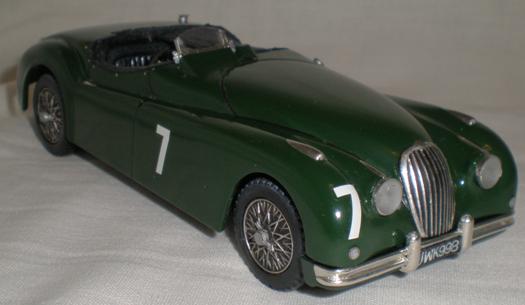
One of the worlds most outstanding post war cars the XK120 was launched in 1948 and caused an immediate sensation finding particular favour in America.
Ian picked this model up at Scale Model World 2010 along with several others. His immediate intention was to make Sir Stirling Moss’ car as raced at Dundrod for the 1950 TT, a race which he won.
Initially Ian thought this would be a simple clean up and decal job but the more he looked at it the more he realised he had to do a full rebuild. If the original builder is reading this we want to be clear this is not a reflection on the work they did but of Ian's need to change the model to a racing version. Lots of differing skills were used but in line with current credit crunch principles no money was spent on parts or even paint for this model.
This is an example of the restoration process to back up our article on restorating model cars.
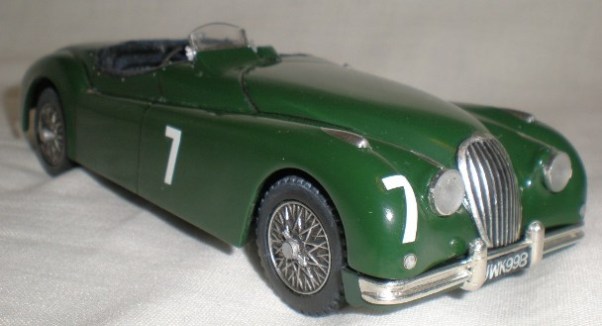
To make this conversion would require a new aeroscreen, to replace the wind screen, and some no.7 decals. Then Ian did some research and realised there was a bit more to it than that. Isn’t that always the way!
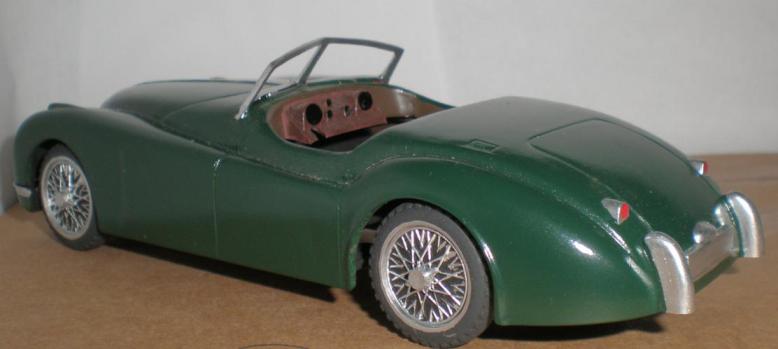
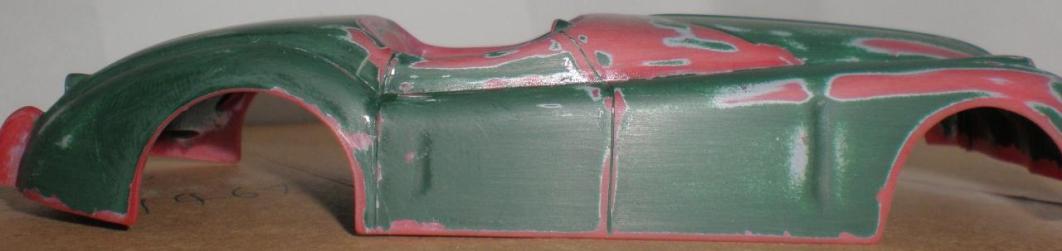
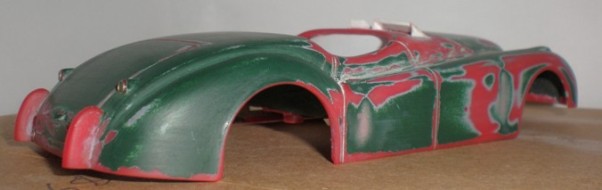
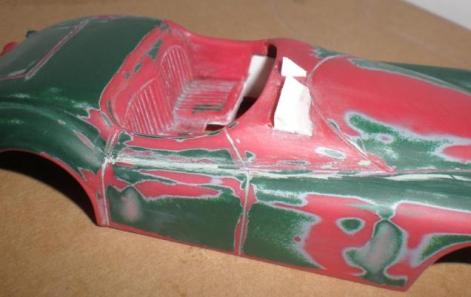
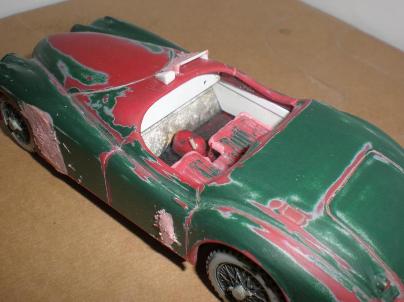
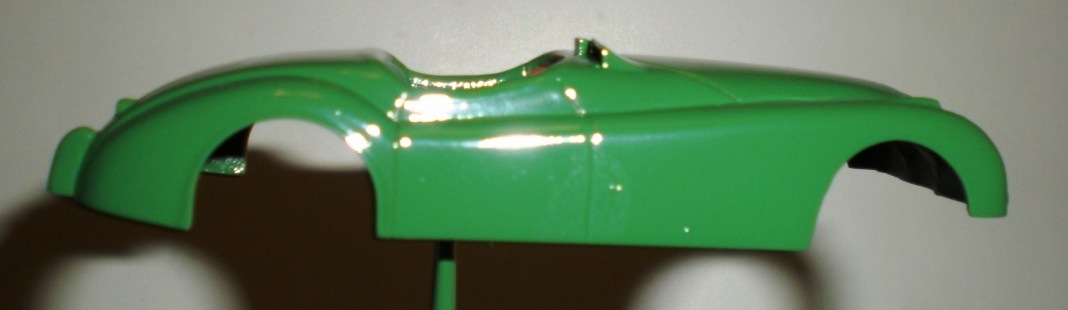
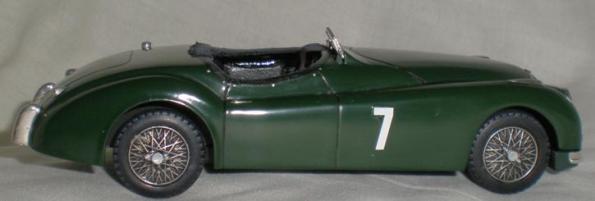
The model had been made to a good standard as can be seen in the original state photos. It did have some rather bad sink marks in the sides which are easily visible and Ian couldn’t think of an easy way to remove the windscreen and touch up this area, thus it became clear he would have to strip the paint after all.
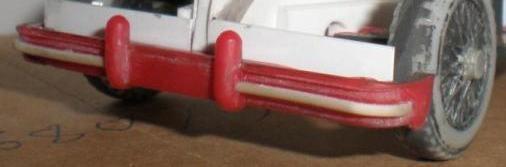
Other items Ian noted were the very inaccurate dash board, the missing steering wheel which had been left hand drive and some of the silver paint had spread a little more than intended. It was also evident that the kit had lots of space in places where light shouldn’t be showing through, not just in the wheel wells but in the join between the body top and the front bumper.
The kit is clearly old in origin and we couldn’t find any makers name or mark. The detail isn’t what you would call crisp or for that matter accurate but it’s not so bad as to warrant throwing away. In the museum we are also showing the development of the modelling hobby as well as the development of the cars. So old isn’t “bad” to us.
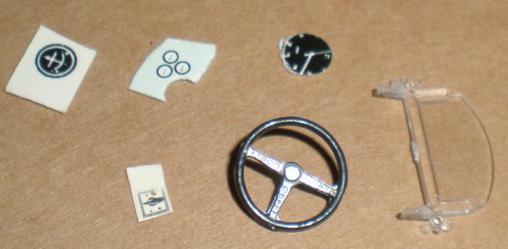
After some digging in his spare parts boxes Ian found a suitable three spoke steering wheel (which looked similar to some he had seen in photos), an aeroscreen, some numbers and gauge decals and some photo etch rings and parts which might come in handy. Ian put all these bits in an old Chinese takeaway box, along with the car, for safe keeping.
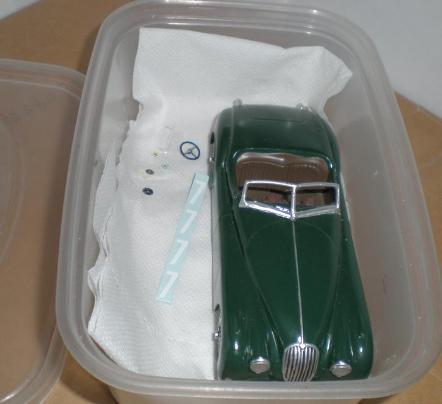
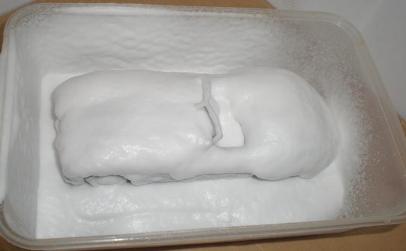
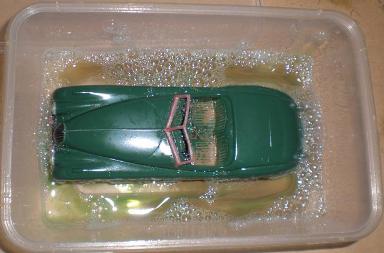
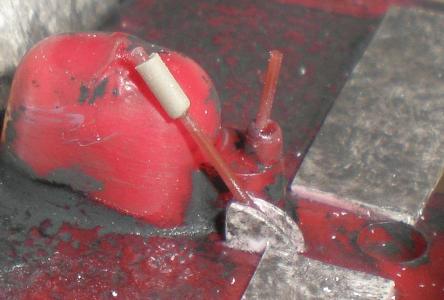
This type of box comes in very useful for all sorts of modelling jobs. Being airtight they are great for stripping off paint. Any enamel paint will be stripped by an oven cleaner, with no effect on the plastic, or even clear parts. (but it does strip the plating of chrome parts, although that’s not always a bad thing if they have lots of mould lines in them).
Simply spray the oven cleaner all over the model to be stripped and place it in an airtight box or bag over night. You can put in all the little bits that need stripping too, as long as you take care in the morning not to wash the little bits down the drain. In the morning there will be some liquid gunge to clean off which can be easily done under the tap. It’s the fumes that do the work so you don’t have to go mad covering the model. You must be aware of the effects of breathing in the fumes and take sensible precautions.
The acrylic type car paints are less susceptible to this method but in this case Ian found the areas that had had enamel paint over them did come away easily with a little brushing and sanding. The rest just sort of flaked off during sanding which left a poor finish initially but after a lot of work it smoothed down and I had a good key for the new paint job.
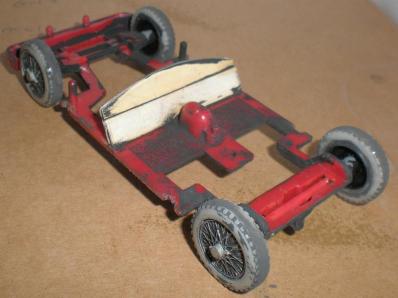
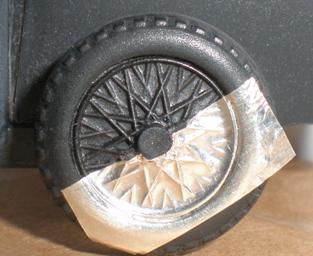
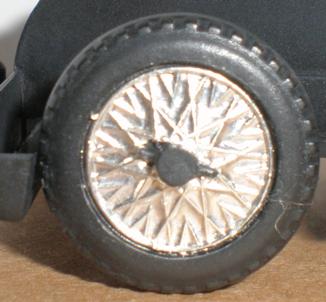
After stripping off the paint Ian could see the work done originally to close up the cockpit. This would later give him a good basis for more work in this area as the changes to the dashboard area meant that the fire wall needed to build up with some Evergreen plastic strip. Also the wheels appear to be from the Airfix “E” Type Jag kit. These are eminently suitable for the job and surely better than whatever the kit originally had.
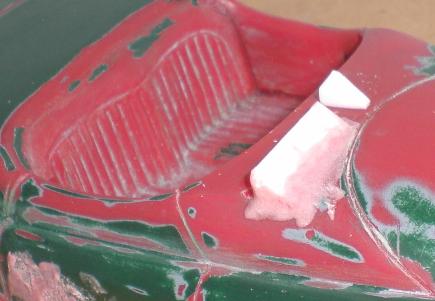
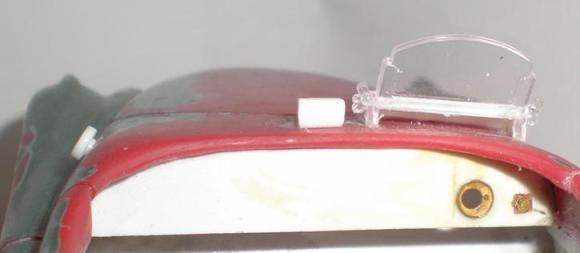
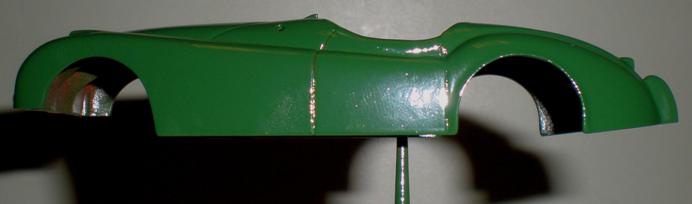
With the sink marks now clearly in view Ian decided to fill them up. On this occasion he used ISOPON 38. This is a proper two part car filler, it doesn’t shrink with time or under paints, dries quickly and is easy to sand. The tub Ian has is several years old proving, if you look after it, it is quite cost effective too. At the same time he marked out the position of the aero screen and built the mounting for this and the rear view mirror. These had a touch of the same filler to help blend them into the bodywork too.
Now came the grueling part. The dash board was so wrong Ian had to cut it all out. This wasn’t too hard but the moulded in seat sides also needed to come out. Ian couldn’t get any sort of saw into the space so had to rely on the old time method of repeated scoring till he cut through the thick plastic. Ian was already planning the tonneau cover so fortunately only had to do one side. Careful sanding and filing was now needed to tidy up these areas but having also noticed that the seats were very thin so padded with some plastic strip and filler to build them up too.
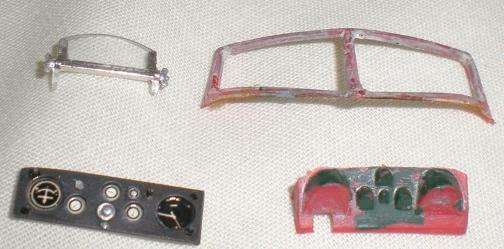
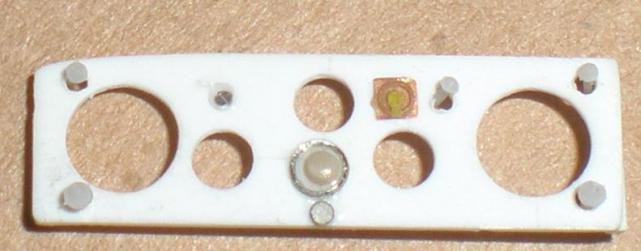
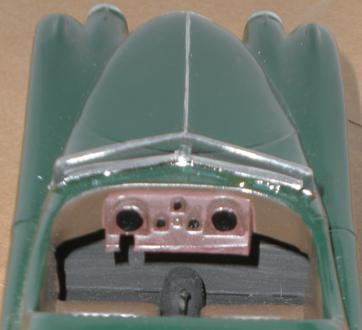
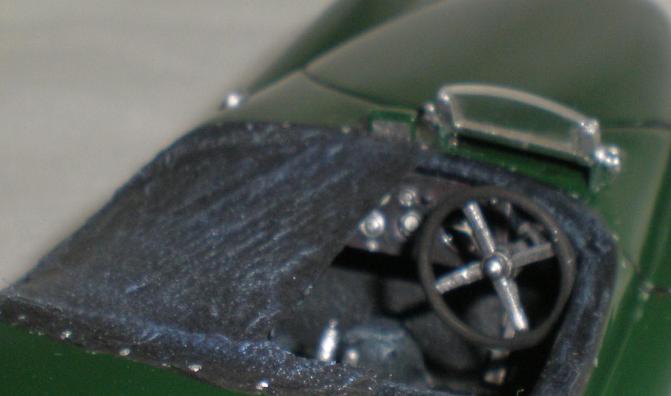
Making a new dashboard from plastic isn’t difficult, Ian had just the right size of strip in his box and just had to cut two triangles of the same size to give it the angled look evident in photos. The backing part was also cut from another size strip, then shaped to fit the inside of the body with repeated sanding and trial fitting. The dash had the necessary holes drilled in it and filed out to the size I wanted in order for the gauges to show through form behind.
Other details were then added. Several sizes of rivet heads from the Grandt line railway parts range give the pull switches. Some other suitable items from the “Rai-Ro” photo etch 1/32nd scale cockpit set were added to both parts of the dash. A new driver door interior was made from plasticard. Ian had to measure up, fit, trim and re-trim several times to make sure it not only fitted to the side of the body correctly but still allowed the chassis to fit back in to the right depth. Special care was needed as the new interior had to fit as closely as possible to the fire wall on the chassis.
The cockpit interior was also in need of a gear lever and hand brake. These were made from two differing sizes of plastic rod. Ian made some simple quadrants from plastic strip shaped up together to make them the same.
Then some thin rod was put in between the already attached quadrants, and into the gear gate cover. That left the slightly harder job of drilling and shaping the larger rod so it could slip down onto the thin rod already put in place to replicate the handle and release button. Although a little tedious it isn’t too hard.

The gear knob was made in similar fashion so that a slightly larger thickness of rod sits on top of the lever.
At this point that we must admit something… you remember Ian said be careful not to wash the little bits down the drain in the morning? Well guess who forgot and lost the original gear stick and the new steering wheel he had found…… fortunately Ian found a steering wheel of similar size and there are some photos of four spoke steering wheels in use too, compramise needed, but model saved. Phew!
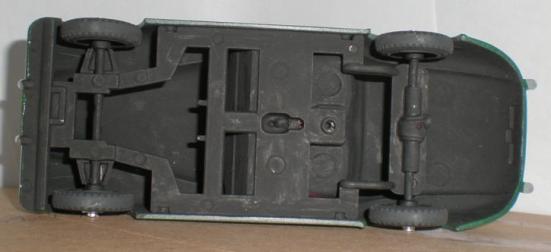
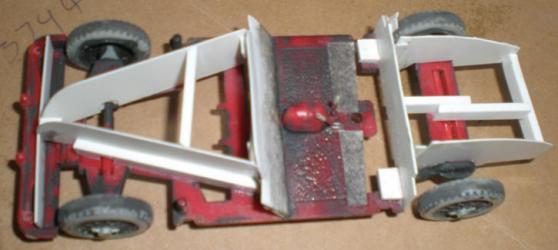
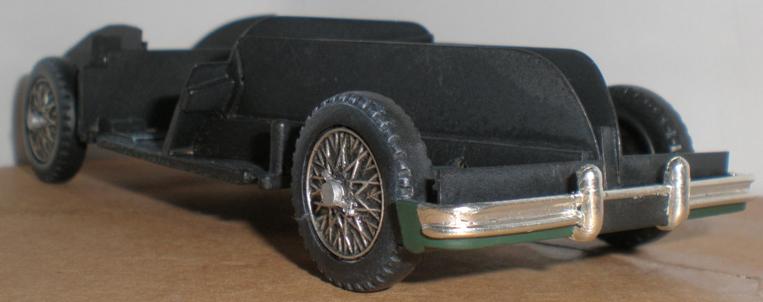
Now attention turns to the chassis. How to stop all the light shining through the car. This was especially important now Ian had separated the seat from the side of the car and left a gap which showed through to the rear wheel. He found a series of pictures on the internet used by restorers to order new body panels. Ian used this to help design panels that would fit in the model but along the lines of the original car.
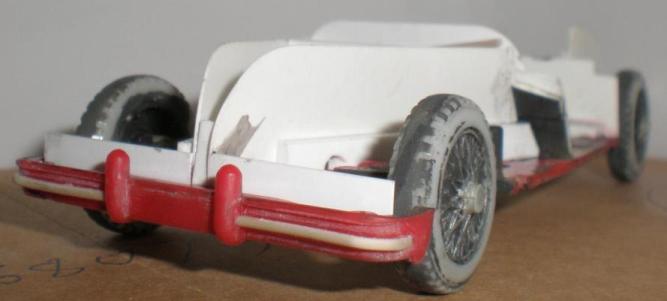
It’s not necessary to go to great lengths in this area, the point is to block the light not reproduce a full chassis. This technique was used for the wheel wells and seat back, then a simple strip was added at the front of the chassis to stop the light coming through between the body part and the bumper. Some strengthening was added from plastic strip to help hold everything in place.
While studying the painting of the Moss car during the Dundrod race Ian noticed a few other differences to the road car. We’re not totally certain about what appears to be an external oil filler cap on the left side of the cowling but there is definitely something there on the painting and this was the best interpretation logic came up with.
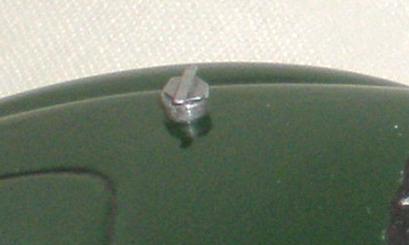
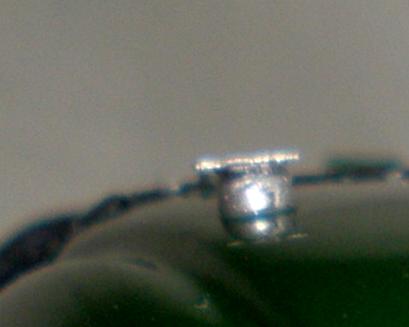
There external fuel filler is much more straight forward to believe. The oil filler cap is out the spares box but the fuel filler cap was made from plastic rods and photo etched parts from the old S&S specialties scratch building shapes set.
Further detail study prompted the addition of the other strengthening shape in the front bumper, this was done slowly by bending the closest size rod I had to fit the curve and then carefully gluing on with liquid glue. The problem is that bending rod at the same time as gluing often leads to the rod breaking in the middle of the bend, you have to make the shape first then fit it. Once the glue was properly set it was a simply sanding job to attain the desired shape.
Next up was the leather detailing around the cockpit opening. Ian used masking tape for this as it sticks down well enough, is grained and can be easily cut with a sharp scalpel blade. In hind sight he feels he should have used tissue and gloss varnish as he later did for the tonneau cover. The grain of the masking tape is too big and in this case became clogged with paint. The grain is more suited to 1/24th but it may have been a bit better if he had put this on post priming too.
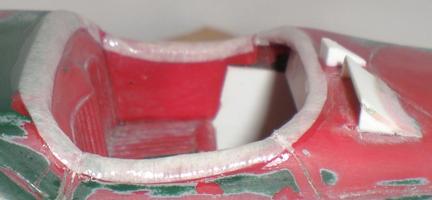
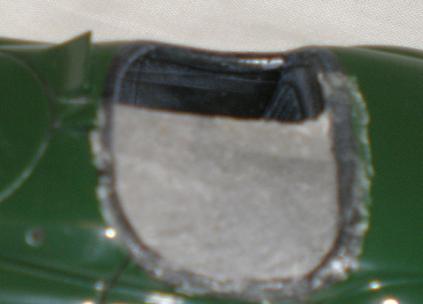
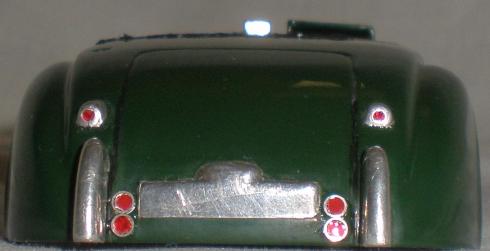
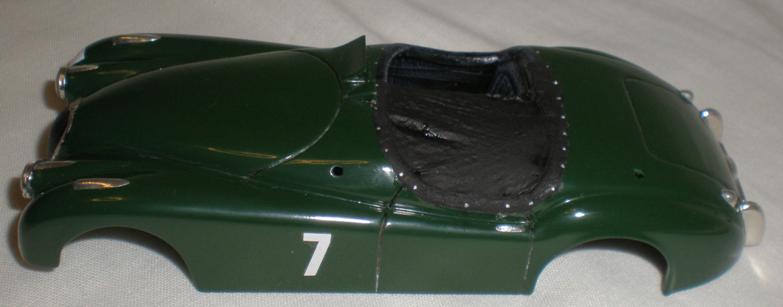
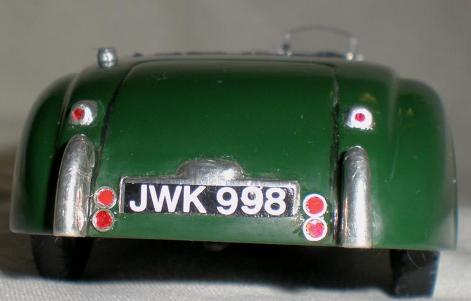
Photo etched rings from the wizard of O’s sets were used to give an impression of the rear lights and reflectors, thinking this would be helpful later on. These would have been better fitted post-priming as the extra paint layers virtually covered them right up. In the end more had to put on over the top during the finishing stages. Very wasteful! If these had been put on after the priming then they would have polished through the body colour to give a smaller profile. In hind sight this could have been done with bare metal foil as on the small lights and door handles so they could be polished through. So much easier than trying to cut the shape out when the moulding detail is so poorly defined.
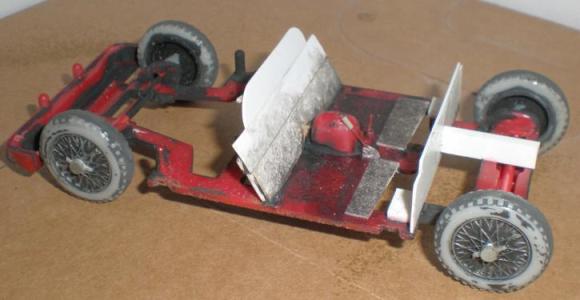
Ian sprayed the chassis with several thin coats of matt black Halfords paint. Some areas still had the remnants of enamel paint on them and this does not take well to having car paints sprayed on it. It just bubbles and cracks up and looks awful. Sand back and repaint with enamels or your prefered acrylics.
Now for the wheels.
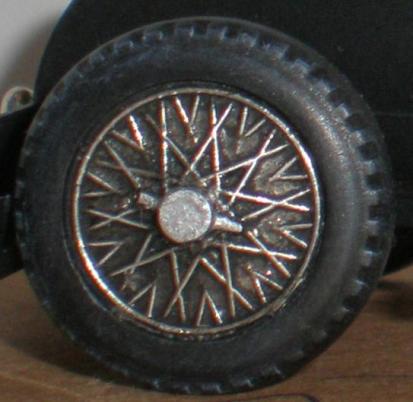
Halfords satin black is good as a base coat for tyres. New tyres are seldom really matt but the effect of dry brushing shades of grey over the satin black is really good. I covered the wheels with bare metal foil. I did half a wheel at a time firstly pushing it down with a cotton bud then further in with a wooden tooth pick. Once the foil is all smoothed down I washed on several coats of thinned matt black enamel paint. After giving each coat a few minutes to dry I carefully rubbed the tops of the spokes with some tissue to bring back the shiny metal look. You need to build this up slowly to gain the effect you are most happy with, it’s easy to overdo it!
With the chassis now sorted we go back to the body. It took a couple of coats of rubbed down primer and the same of body colour to build up the quality of finish Ian was happy with. Those sink holes took quite a bit of work to get rid of! In this case the mounting of the body on an old paint brush handle made the spraying easy. There was a tube that I can only assume was originally meant for the model to be screwed together. Otherwise I have an old wire coat hanger which I bend into all sorts of shapes and tape inside a body when I am spray painting.
With the body at a fair standard it is then cut back with colour restorer and polished it with micro gloss. Bare metal foilwas applied to the side lights, door handles etc in the same way outlined before but then trimming back the foil to the shape of the item. After checking several paintings and plan drawings number seven decals were applied. Ian couldn’t find any mention of a number on the rear of this car, also, strangely, there doesn’t seem to be one on other XK120’s either.
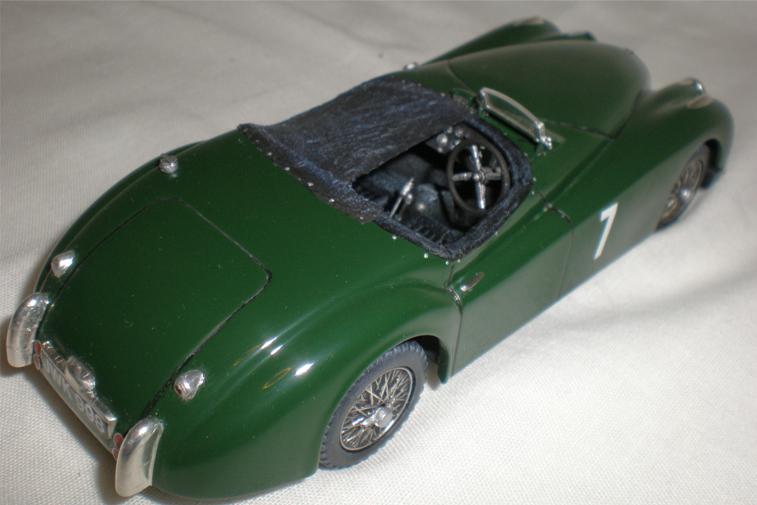
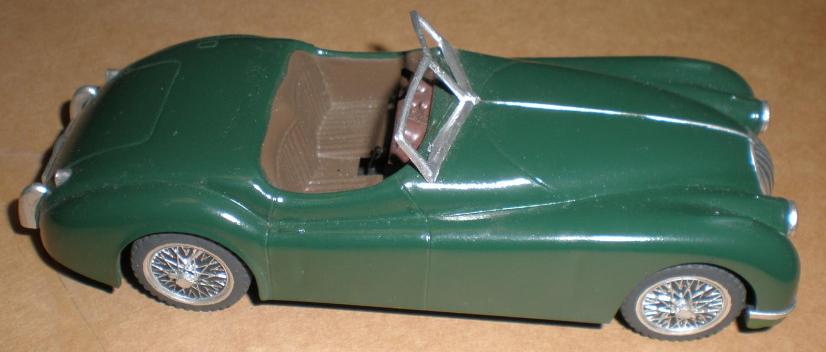
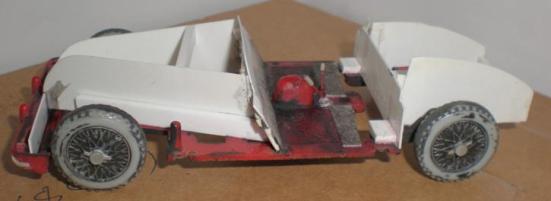
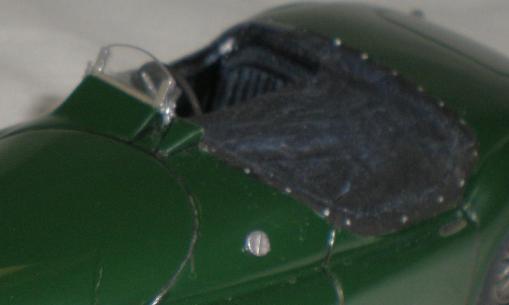
Satin black enamel paint was applied to the seats and interior then dry brushed with shades of grey from the citadel acrylic paints range. A paper template was made for the tonneau cover then the required shape transferred to some tissue paper. That could then be carefully fixed in place with some gloss varnish. In the past I would have used watered down PVA for this and it does have some advantages in being easier to clean off after its dry. The gloss varnish has the advantage of shrinking as it dries so even though the cover was drooping when it was wet it pulled itself taught as it dried. To pick this out as different to the seats Ian used matt black paint and dry brushed it with shades of blue as well as grey. Small dots of silver paint give the impression of the fasteners.
Getting near the end now Ian was paying more attention to the details. Putting the body on the chassis and having a look into the cockpit brought the realisation that there weren't any pedals, and these really were needed. To fabricate them Ian used lengths of plastic rod and strip. Ian admits he didn’t go to any great lengths to measure up etc.' as he just wanted to give the illusion of reality in the area of the foot well.
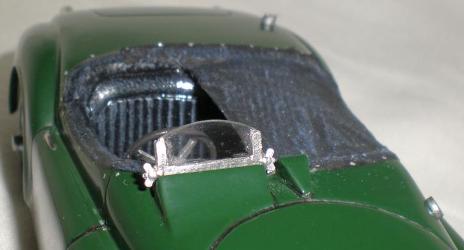
The detailed and painted dash was attached by use of clear varnish. This was the same way the dials were held in place. They are cut over size so they just sit behind the aperture, with clear varnish also run around the front in order to simulate some lenses. These aren’t the same as the real thing but give an acceptable impression. Ian was quite surprised how well the final sub-assembly looked compared to the original cars dash. The new steering wheel was put in place with super glue. The aeroscreen was sanded down to a lower profile then some BMF was applied for the frame, a little silver paint was used on the wing nuts. This item was fixed to the car with protec clear varnish. A small oblong of BMF covered with protec clear gloss simulates the mirror glass.
Final details include the number plates. The rear was easy as having cut an oblong of plain black decal to the size required one could simply apply 2.5 mm white letraset characters to it. To protect them they are given a coat of clear protec then once it is dry the decal can be applied to the car in the normal way.
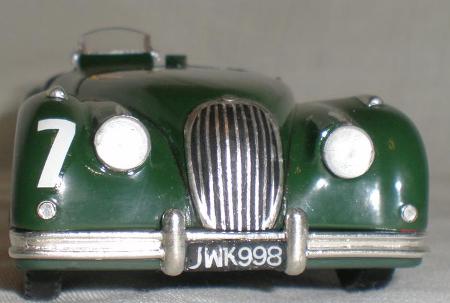
The front proved more difficult because the kit for, some bizarre reason, doesn’t give the same amount of space at the front. Ian had to put together and adapt a series of decals cut from old fire engine decal sheets.
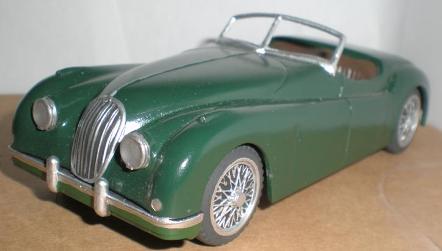
Finally he had to attend to the front grill. Unsure what to do with this throughout the build, paint and dry brush it? Foil and wash it? WHAT! Eventually, seeing that the lack of detail clarity meant neither of these would be very effective.
Ian decided to apply strips of Studio27 silver decal (set noFP0010) over matt black paint. With much care and judicious use of microsol the strips went down well. Just to be on the safe side it was all covered with satin clear protec varnish.
Well that’s it. A model that cost a few pence, parts from the spares box and additions from years of collected photo etched and decal sets, plastic strip and rod and left over odds and ends. Even the paint was left over from another car.
More information and Photo's of this car can be found within the museum.
If you have a question please feel free to e-mail us at,