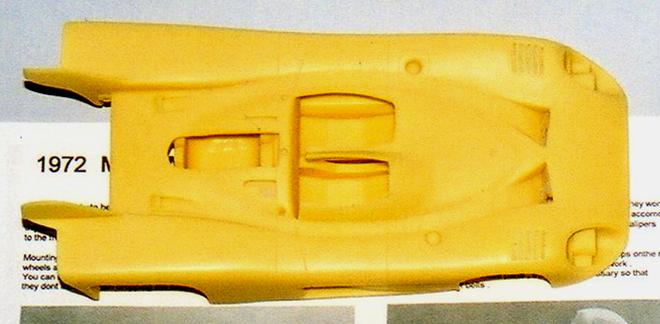
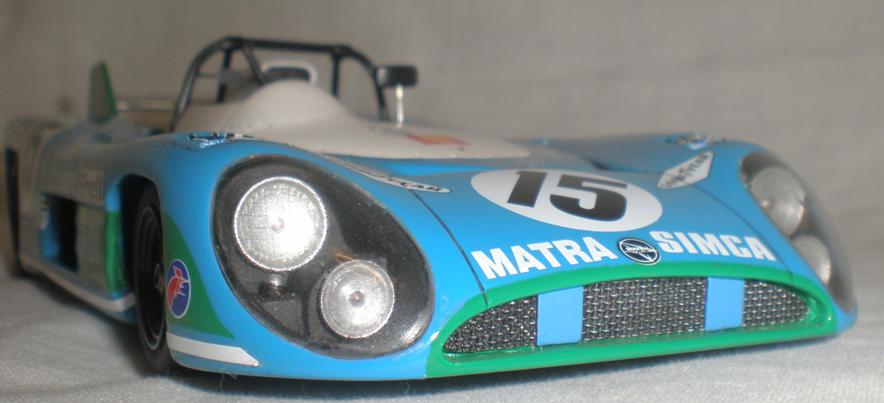
1972 Matra 670 le Mans winner
In this article we take you through the build of a resin kit.
Although they present different challenges to plastic kits once you learn the techniques and gain some confidence a whole new range of rare and varied subjects opens up.
Resin kits are becoming very sophisticated now but few of them are beyond the average modellers skills.

What you get in the box, two large resin body parts, separate wheels and resin cast tyres, a resin sheet of small parts and some small separate items. Decals and vac’ formed lenses & light covers, instructions and a colour photo.

The instructions are descriptions backed up by build photo’s, not what we are used to, but adequate for the model.
The kit is actually very nice (part of a very nice range too). The resin had a few small air bubbles but nothing much. It had crisp detail and all the parts were very well cast.
The main body parts needed a little cleaning up, simply a gentle rubbing down with wet and dry emery paper. Remember to wash the parts with mild detergent just like you would plastic model kit parts.


Resin dust is potentially toxic and you should wear a mask to prevent inhalation of the dust. It is best to use the paper wet to minimise dust flying up in the air.
You can see that the best way to sand the part off the resin sheet is rub it down on a flat piece of wet and dry emery paper, being very careful to keep the part level and even so the backing simply rubs away. This can be seen on the left.
Note the amount of dust generated! The tooth brush is to help clean out all the accumulated dust that builds up in the detail.
All the cleaning up is the part most different to building a plastic kit. Once the parts are ready for priming and painting there is little difference to building any other kit.
To fill any large air bubble holes use any two part epoxy car filler, milliput or similar fillers. Your usual styrene fillers wont bind very well to the resin and this may cause deterioration of the model as time goes by. For small holes use a drop of super glue applied with a tooth pick or cocktail stick. As soon as it sets start to sand it down to a smooth level, if you wait till the next day the glue goes so much harder than the surrounding material that you almost always end up damaging the area more than sanding down the superglue.


The body was given a coat of white primer and sanded down. Then the Gloss white coat went on and it too was sanded down and then polished. Once that paint coat was hardened it could be masked and the green areas sprayed.
It is usually a good idea to remove any masking as soon as possible, this prevents any adhesive products attacking you paint finish., however if the paint is still soft it can lift and tear so you may find it helps to run a sharp blade along the edge of the masking to separate the mask from the painted area and reduce the risk of paint lifting. It gives a clean straight edge too.
Once the green paint was dry, sanded and polished, more masking was needed so the finial blue body colour could be sprayed.
The white stripe is Trimline self adhesive strip. It is generally used by radio control car and aeroplane builders but has it’s uses in the static display world too.
With all the paint coats on, sanded smooth, T-cut and polished, the final touches for the body were brush painting the lights and housings then inking in the panel lines. Now the body was set aside to fully harden off, well away from any sources of dust.


The base plate of this car is rather basic on first look. Ian Airbrushed Tamiya paint for the cockpit interior. Once some dark ink washes, and light shade dry brushing, had been done the bland area starts to come to life.
The engine area responded in much the same way and what can be seen is quite realistic.
The two part system of chassis and body is fairly standard for resin kits. Many of them are ‘kerbside’ or ‘slammers’, meaning they have little detail away from that which can be seen as the model stands on the table. This isn’t a problem to most of us mere mortals, if you want to scratch build more details go right ahead.
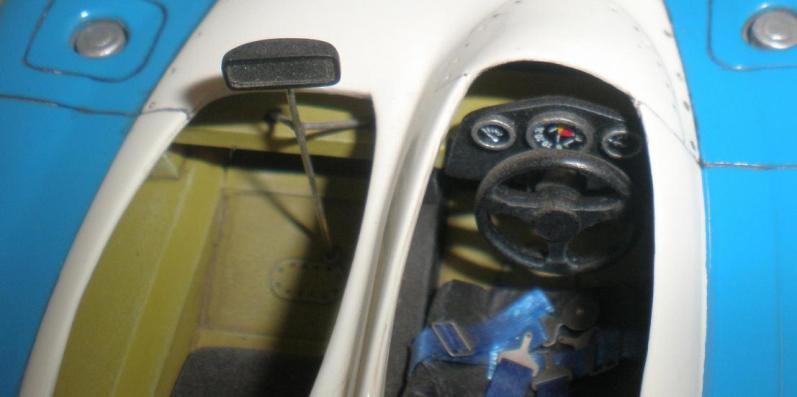
There isn’t much to see inside this car but what there is has been well reproduced by Fisher.


A simple coat of primer then Citadel acrylics were brush painted on the seats, while Halfords car paints gave a base coat for the ancillaries and steering wheel. The methods for mounting the parts for spraying are self evident.
Photo-etched bezels were used to accentuate the gauges, the faces are decals from the kit.
Now to mention the other major difference between plastic and resin kits. You can’t stick the bits together with your normal styrene adhesive. You need Cyanoacrylate.... Or super glue to you and me Two part epoxy adhesives can be used if you like but being rather simple folk we keep it straight forward and use superglue, it's also quicker.
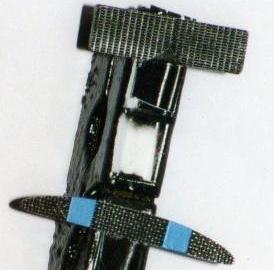
Now back to the build. Seat belts. These are supplied as a small photo-etched fret but the material is from another after market source, possibly MRM, (who no longer trade) the photo-etched parts are fiddly but easy to use, trim them off the fret on a hard surface using a heavy duty knife, like a Stanley knife, and being very careful not to cut yourself or let the parts fly off. You may choose to mount the whole fret to the hard cutting surface using double sided tape, this can help stop bits flying away.
Cut strips of material the right width to feed through the buckles, I don’t want to teach granny to suck eggs as it is straight forward to measure out the width and lengths you require. Getting the belts to stay attached to the seat can be rather more tiresome. After trying several different options I now use clear double sided adhesive tape for all the seat belt building as well as attaching them to the seat (or I use masking tape for the material which is self adhesive). Use a clear double sided tape so if a bit shows anywhere it isn't glaringly obvious.
One of the most important things with building resin kits is lots of test fitting and dry runs. Make sure everything lines up and fits together well, and repeat the process regularly to ensure it still fits together well after a few coats of paint have built up. You don’t want to put it all together and then fid only three wheels touch the ground either.
The mirror mount needed a little scratch building to add the supports and the main stay. 15amp fuse wire does the trick!


Once the chassis is put together it can be mated to the body. In this case it also entailed building the sub frame supporting the exhausts, gearbox and rear bodywork. Once all the adhesives were dry the parts could be brush painted with Citadel acrylics.
Bare metal foil has been applied to the rear wing and to the rear light clusters. Tamiya clear red paint was built up over several thing coats making sure each coat has plenty of time to dry before applying the next. A small wash of dark brown Citadel ink helps separate the domes from the mounts.
The exhausts are simple aluminium tubing cut to length and polished before some washes of citadel inks are applied to give heat and dirt stains. They are fixed to the chassis with super glue.


The grills and radiators had drybrushing and ink wash techniques applied to give them some life. Halfords car paints were used for spraying the disc brakes and metallic bits, then these parts had the usual washes of Citadel inks which help pick out details and stain the different areas to simulate differing metals.
The wheels and tyres came separately cast in this kit and this helps greatly with the painting. After priming the wheels were painted gloss black but the solid cast tyres were painted satin black. Tyres are seldom Matt black but aren’t shiny either so satin gives a good base coat for tyres. You can then gently drybrush some highlights. The wheel nuts were brush painted with Humbrol enamels, then washed with Citadel inks to give some depth to them.
The front light clusters were moulded into the body. After the black paint had thoroughly dried the lamp bowls were covered with bare metal foil. Then comes the part I hate the most, Vacforms!
One slip and the parts are ruined so make sure you take your time. It is quicker to go slowly than to rush, make a mistake and you will spend ages trying to rectify the problem, or waiting for replacement parts to arrive in the post.
The process for using vacuum formed parts is quite straight forward. Trim the part from the backing sheet, leave some scope for errors and knife slips, and slowly sand away at the shape till it fits. It can be tedious but when you get it right it can look very good and certainly gives a sense of having achieved something.
Having followed the process for the lenses and the light covers you need to fix them in place. Back in the 1990s we used watered down PVA glue but nowadays there are clear acrylic varnished that will do the job much better and more securely.


Final fitting of the roll bar and engine air intake is straight forward and then all that’s left is decaling.
So to summarise the differences between building a plastic kit and a resin kit:-
Resin kit parts are more messy to clean up,
You may have to do a little scratch building (rod, strip & wire may be in the kit),
You may have to deal with vac-forms for the clear parts,
You will need different fillers,
You will need different glue, and,
You must take your time, test fit everything.
But really, not that different at all.

For More pictures and history on this car click on the picture to the left, or for more Graham Hill cars click on the link below.